
Now I've seen quite a few people asking how to do this so I thought I would post a little tutorial. Teaching is my life, after all, so I should be able to make this pretty easy to follow.
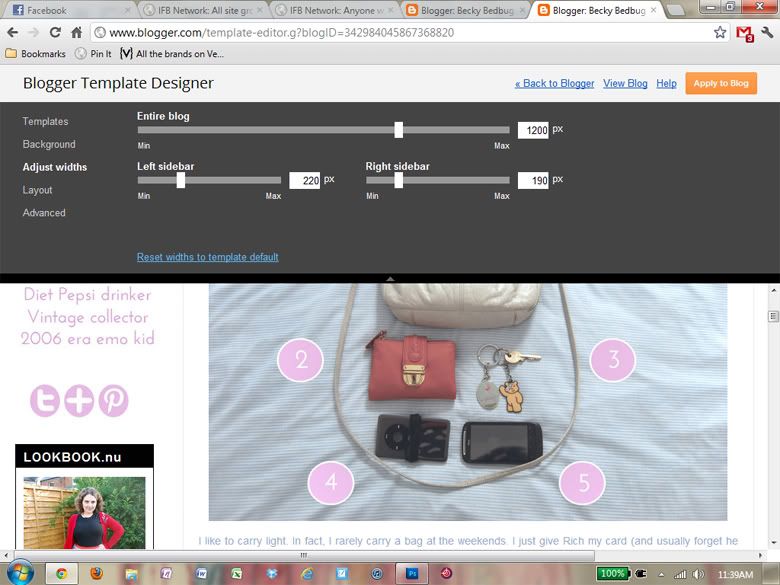
 Right, first things first, you need to check the width of your margins. On the Blogger Dashboard, go to design> template designer> adjust widths. As you can see, my entire blog is 1200px wide. This includes the 220px left sidebar and 190px right sidebar. If I take away my sidebars from the entire blog (1200- 220- 190), I am left with 790. This means that the main column of my blog, the middle part where I'll put my photos, is 790px.

 Right, first things first, you need to check the width of your margins. On the Blogger Dashboard, go to design> template designer> adjust widths. As you can see, my entire blog is 1200px wide. This includes the 220px left sidebar and 190px right sidebar. If I take away my sidebars from the entire blog (1200- 220- 190), I am left with 790. This means that the main column of my blog, the middle part where I'll put my photos, is 790px.
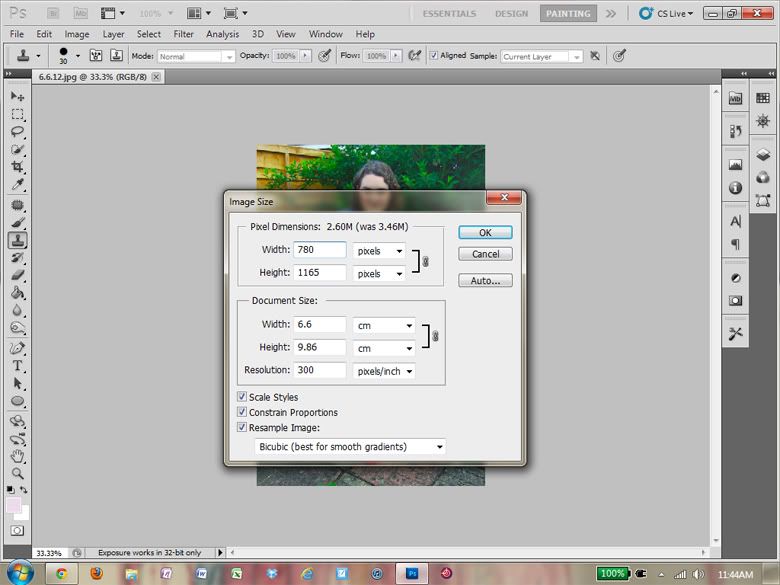
Now I am going to go to Photoshop (you can use any editing software) and resize my image. I know that I have 790px to work with so I am going to make my photo slightly smaller at 780px.


Ok, now that I have saved the smaller version of my image, I head over to Photobucket (again, you can use whichever platform you prefer) and upload my image as usual. Then I want to copy the "direct link" code.


Back in Blogger, on my posting page, I click the usual image button (the one above the text box with a little landscape on, in case you're a complete beginner to blogging) and paste my direct link into the "add an image from the web" box. Click upload and hey presto! Big photo!
No comments :
Post a Comment
I read all comments and appreciate every single one, even if I can't always reply. If you have a question or need a reply, feel free to tweet me @BeckyBedbug- I always reply to tweets!